Showing posts with label arts and crafts. Show all posts

Wednesday, July 6, 2016

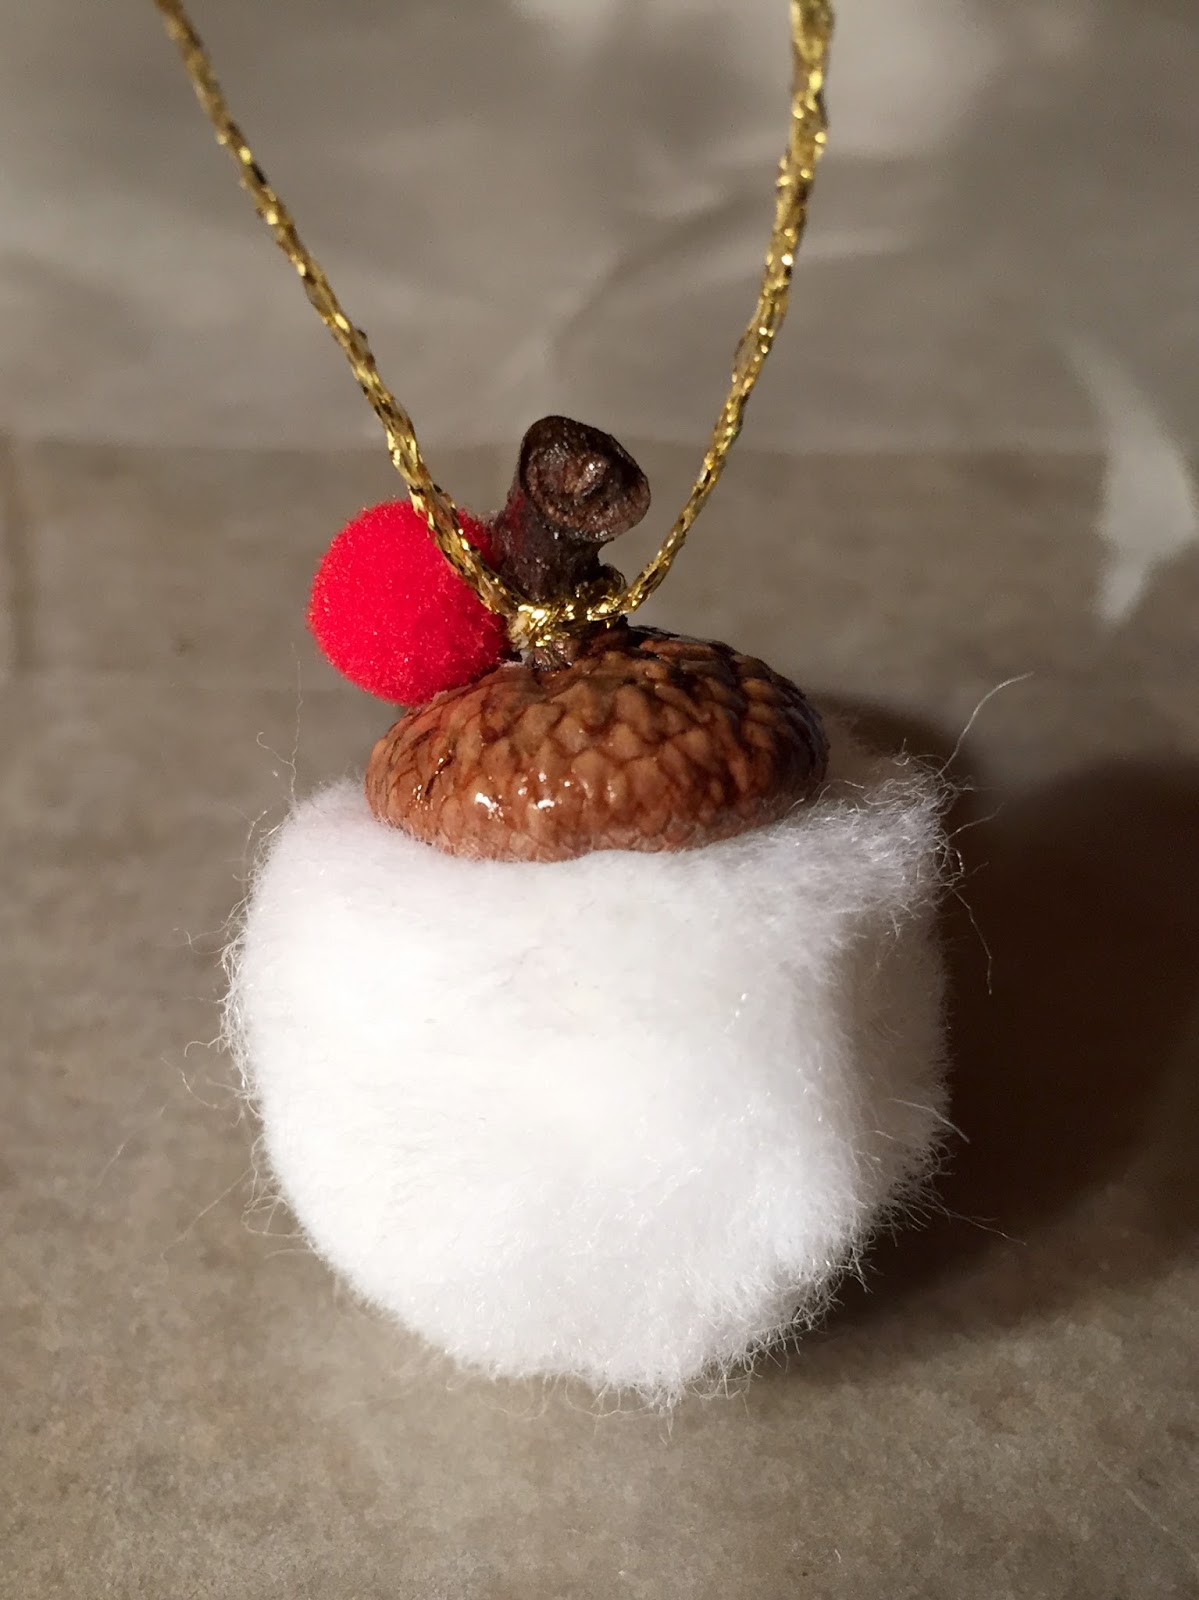
Christmascorns


As we've rescued boxes of old ornaments from yard sales, from time to time, we find kindergarten-made treasures. I smile when I see those glittered pine cones and plastic cup snow globes, imagining the maker's pride as he carries his masterpiece home from school to be admired by loving parents and displayed on the the tree for all to see.

In homage to kindergarten ornament makers everywhere, Christmascorns are cute little "miniments" great for the tree or a nice added touch to your gift wrapping. They're easy enough to make with the kids and fast enough to make a bunch in no time. Enjoy!

WHAT YOU'LL NEED
  • Acorn Caps
  • High Gloss Shellack (I used Martha Stewart)
  • String for the hanger
  • White Pom Poms (I used 1" pom poms for these but choose any size that fits your acorn caps)
  • Glue (I used Gorilla Super Glue but any kid-friendly glue should do the job)
  • Dimensional Fabric Paint in Black and Red or Orange (I used Tulip brand paint)
  • Glitter

JUST THE CAPS, MA'AM
Look for caps that have a long stem, and even better, a stem with a curve. This makes it easier to tie on the string. Prepare your caps with a glossy shellack. The shellack gives them a nice shine and brings out their warm tones. (You could also paint them if you'd like.)


HANGERS
Tie a string around the stem and tie a knot to hold it in place. Tug gently to be sure it's secure. Then, draw up both ends of the string and tie a double knot to create the hanger.


For caps that have small or straight stem, use a dab a glue to be sure it will hold. But note, when I added glue, it left a bit of residue so I covered the spot with a tiny red pom pom.


JUST ADD SNOW!
Glue a white pom pom into the cap. Be sure to press the pom pom up into the cap and hold it for a bit to be sure it sticks. The pom pom will relax and fluff out when you let go.


And how cute is this! I had a few double caps in my stash... Christmascorn Twins!


And see. These are so fast and easy to make, I made a bunch all at once!


FACE IT!
Dimensional fabric paint makes it fast and easy to create the face. I pressed the tip of the bottle into the pom pom a bit to be sure the paint wasn't just sitting on the surface. Squeeze gently and you'll see the paint seep into the pom pom and rise to the surface. You might want to practice first to get a feel for it but once you get the hang of it, it's really easy.

THE FINISHING TOUCH
And it wouldn't be Christmas without a little glitter! I added a tiny bit more shellack to the cap and sprinkled it with glitter!


Don't have time to make them? You'll find Christmascorns in our Easy Shop beginning in August. And remember, all proceeds go to benefit Hasbro Children's Hospital!


Merry Christmas!

Cheryl
Ornament Rescuer


Friday, November 7, 2014

Cap'n Santa

OK. It's a little known fact but Santa loves Talk Like A Pirate Day! And shiver me timbers, he's even got a jolly ol' treasure chest just for the occasion!


I love the intent of this wooden treasure chest ornament, but for Santa, it just doesn't have enough Yo Ho Ho spirit. So, lets get to work. Argh!

NEW TREASURES
I started by emptying the chest, removing the paper trunk labels, and giving it a fresh paint job. Now for the fun part!


I trolled through my stash of bits and bobs and found some treasures I think belong in Cap'n Santa's treasure chest. But my stash was missing some of the essential pirate kit. That means I'll have to make them...

SANTA'S PIRATE HAT
I started with the hat. A simple red, felt ball would do for the cap, and for the tri-cornered brim, I cut a triangle out of matching red felt and rounded the corners. Then I folded the three corners up and tacked them to the cap with a bit of felt glue. I used a bit of white fabric paint to draw the detailing along the brim, and added an "S" for Santa on the front. Oh, and Santa being Santa, the hat wouldn't be complete without a white pom pom on top!


SANTA'S PIRATE HOOK
Now, what do you suppose would make for a great pirate hook way up in the North Pole? You guessed it! I took a candy cane trinket from my stash and hot glued it into the metal top of an old glass ornament. (Be careful. The metal heats up really fast so I found out!)

Of note, my candy cane was a bit too narrow for the ornament top so I had a little hot glue showing. To cover it, I dabbed a little silver fabric paint over the hot glue which wound up adding a little extra sparkle to the effect!


SANTA'S EYE PATCH
A pirate isn't a pirate without an eye patch, of course. And for Santa, red is the new black. For this, I cut two matching pieces of red felt in the shape of an eye patch, then a bit of green embroidery floss for the tie. Super easy, I put the floss between the two piece and glued it together. Then, to add a little Santa flair, I outlined it with glitter gold fabric paint.

FINISHING TOUCHES
And for the finishing touches, I added a candy-cane-and-snowflake insignia on the front and a special Santa message on the back just for you!

Ho! Ho! Argh!

ORL #9: CAP'N SANTA


This ornament has been rescued! Please stop by our Etsy shop to see all of our other ornaments that need a home in time for Christmas. And remember...

All proceeds benefit Hasbro Children's Hospital, Providence, RI.


FOR RESCUERS
If you want to give this a try at home, you'll need...
  • Treasure Chest as a base
  • Toys, trinkets, and other Santa treasure
  • Pirate Hat (see instructions above)
  • Pirate Hook (see instructions above)
  • Pirate Eye Patch (see instructions above)
  • Crafters' acrylic paint (in your choice of colors)
  • Snowflakes (I used snowflake buttons but you can cut them out of paper too!)
  • Hot Glue
  • High Gloss Shellac

The basic steps are...
  1. Clean out the treasure chest. Sand and paint as needed.
  2. Add candy-cane-and-snowflake insignia on the front
  3. Arrange treasure and pirate gear in the box and glue it down
  4. Shellac to a high gloss

Merry Christmas!

Cheryl
Ornament Rescuer

Bunnyboarder

We've been refurbishing ornaments for the past few months so for this next one, I decided to see just how far I could push this whole idea of transformation. See what you think...


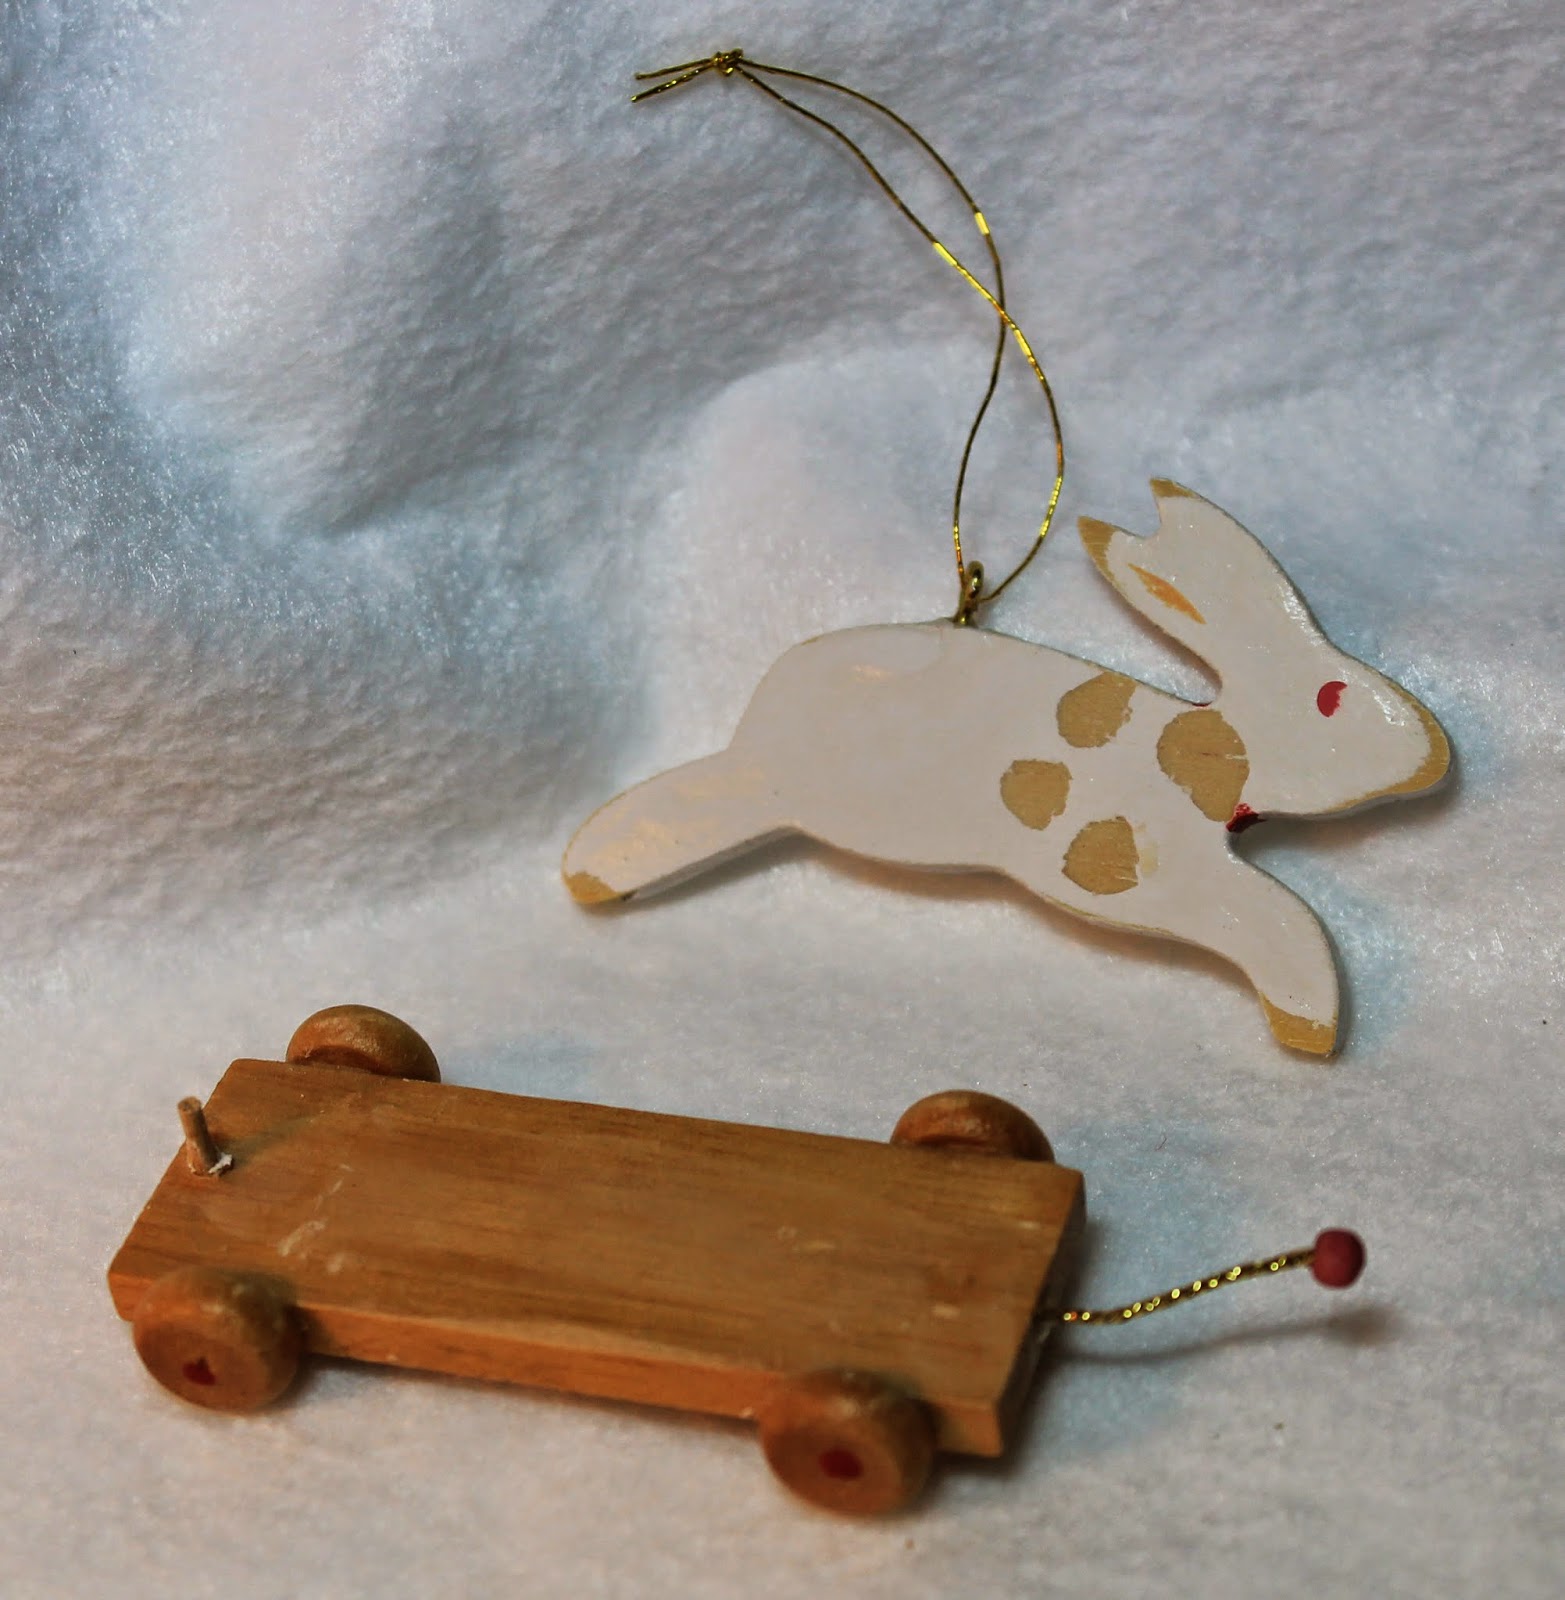
This ornament is a replica of a classic bunny pull toy from the Victorian era. A little tidying and re-gluing and she'd be in fine shape to be adopted just the way she is. But there's something in her spirit I thought could go farther... a lot farther.

LET'S MODERNIZE!
I started by dis-assembling her, removing all the old trimmings, getting rid of the (inexplicable) wood shavings on her roller board, and sanding her down for repainting.


During this strip-down process I realized this is a bunny in a hurry! She's posed as if leaping through the air. And with that came the inspiration for this ornament... and the moment of truth... I clipped off the pull string transforming her from a Victorian pull toy into a Millennial skateboarder!

NEW COLOR SCHEME
To modernize her, I chose a color-blocking approach, graphic white star motif, an oversized cotton tail, and silver bow for a dash of glitter and shine.


But decoration alone wasn't enough to give Bunnyboarder the full transformation I was looking for. In my mind, her new skateboarder-inspired style transformed her need for speed into a passion for action. And for skateboarders, action means the half-pipe!


CANDY CANE HALF-PIPE
I tried a few different ways to create a half-pipe, but the size was so big it overwhelmed the star of our show. So Bunnyboarder and I had a little chat and it turns out North Poleans use hollowed out candy canes at the annual Xmas Games!

For the half-pipe, I took a paper towel roll and cut it in half to better fit Bunnyboarder's small size.  Then I cut along the diagonal to create a twisted section of half-pipe. The twist gave the ornament a sense of perpetual motion yet left lots of open air to see Bunnyboarder from every angle.

I papier-mached the cardboard for a little more stability then painted candy cane stripes to accent the twisted shape. A little shellac, glitter, and a bit of silver trim on the edges to give it a nice finish, and suddenly Bunnyboarder has her our very own half-pipe.

MID-AIR BUNNY!
The final step was positioning Bunnyboarder within the half-pipe frame. Again, to optimize the sense of movement, I positioned her in mid-air by dangling her from the top curve.

Wow! Look at that Bunnyboarder go! (Victorians never had this much fun!)

ORL #10: BUNNYBOARDER
We hope you'll consider adopting our dashing-through-the-half-pipe Bunnyboarder for that special skateboarder in your life!


This ONE-OF-A-KIND ornament has been lovingly restored by hand by the Ornament Rescue League. It is numbered and hand-tagged to show the before/after transformation. It is available for purchase on a first-come, first-serve basis through our Etsy shop. Please stop by and see all of the ornaments we've rescued! And remember... 

All proceeds benefit Hasbro Children's Hospital, Providence, RI.


Saturday, October 25, 2014

Three Little Cardinals

When I was a kid, I spent summers at a lake in a little white cottage with red shingles. And right down by the lake, there was an old birdhouse dangling from a tree, painted to match the cottage. I have such fond memories of that cottage, I thought I'd use it as my inspiration here.


This vintage woodblock birdhouse is rustic and charming but I think it needs more Christmas spirit, don't you?

COTTAGE COLORS
To honor the little cottage by the lake, I'll use only red and white for this ornament. I painted the walls white and the trim red, then candy striped the bird posts.


SHINGLED ROOF
To my eye, the simple structure needs extra details to bring it to life, so I decided on shingles for the rooftop. I measured the width of the rooftop then cut strips of felt in two shades of red. I cut diamond-points to create the shingles, alternating them to create the shingled effect.


THREE LITTLE CARDINALS
For the birds, I grabbed three red pom poms from my stash and they fit like a glove. (Phew! No sewing.) Next, I cut out three bird beaks from white felt, exactly the same as the one I made for Early Bird Catches Christmas. (Thanks again to Abby and her While She Naps blog!)

But before gluing the birds in place I noticed something.

THINK 3D
As I'm learning, ornaments require thinking in 3D. After all, there's no guarantee the ornament won't spin on its hanger and wind up facing backwards. Ornaments are silly that way.

With this one, all the visual activity is on the front, leaving the sides and back a bit plain. I could paint something, but I'm not that great a painter. So I started playing with ribbon to see what effects I could get.

I tucked a piece of red gingham ribbon in the first door, tacking it down with a dab of hot glue. Then, I wrapped it around the walls, tacking it at each corner, and tucking the end into the other side of the door with another dab of hot glue.


Cute!

WELCOME HOME, CARDINALS
Now it was time to add the cardinals. I lined the inside walls of the doors with hot glue and pressed one red pom pom into each. 


Next, I glued on the white beaks with a dab of felt glue and added two dots of black fabric puffy paint for the eyes.

Cuter still!


BATTLE OF THE SEAMS
I believe crafting often comes down to managing seams. Notice the shingles create a seam along the edges and roof peak that  look unfinished to me. A little decorative trim seemed in order and the pom pom motif informed how I was feeling, so I added a little strand of pom pom ribbon to the roof edge.


Then six pom poms along the roof peak not only covered that seam, the eye screw disappeared too! Bonus!


I added bit of baker's twine to create a hanger, and there you have it... three little cardinals at home in their cottage by the lake!


ORL #10: THREE LITTLE CARDINALS 


This ornament has been rescued! Please stop by our Etsy shop to see all of our other ornaments that need a home in time for Christmas. And remember...

All proceeds benefit Hasbro Children's Hospital, Providence, RI


FOR RESCUERS
If you want to try this at home, you'll need...
  • One woodblock birdhouse
  • Acrylic craft paints (colors of your choosing)
  • Felt (colors of your choosing)
  • Felt glue
  • Pom Pom ribbon (I found mine at JoAnns)
  • Pom Poms (colors of your choosing)
  • Hot Glue

The basic steps are...
  1. Clean/sand your birdhouse. As needed, add a eye screw at the center of the roof peak.
  2. Paint the birdhouse as you see fit.
  3. Measure the width of your rooftop, then cut strips of felt all to the same size. (Mine were approximately 5/8" wide)
  4. Cut half of the strips in a diamond pattern, beginning and ending with a full diamond
  5. Cut the other half of the strips beginning and ending with a half-diamond
  6. Glue the strips to your rooftop, laying one on top of each there, to create the shingled effect
  7. Measure and cut ribbon to approximately 1" longer than the circumference of your ornament.
  8. Hot glue one end of the ribbon inside the birdhouse door.
  9. Wrap the ribbon around the sides, gluing it down at each corner.
  10. Hot glue the other end of the ribbon inside the birdhouse door.
  11. Repeat for all the doors.
  12. Hot glue the inside of each birdhouse door, pressing a pom pom in to secure it, but still allowing it peek out.
  13. Cut out and glue a bird's beak to each with felt glue.
  14. Use puffy fabric paint to create dots for eyes.
  15. Hot glue pom pom ribbon around the roof edge.
  16. Use felt glue to attach pom poms down the roof peak seam.
  17. Attach hanger to the eye screw.
  18. Enjoy!


Merry Christmas!

Cheryl
Ornament Rescuer

Monday, October 6, 2014

Button Bear

Look at that sweet face. Don't you just love teddies for Christmas? But what's with all the buttons?


Now, don't get me wrong. I can appreciate the effort it took to sew on all those buttons. I just can't figure out why. And here's another curiosity. Notice there is glue residue on the arms and legs. Could she have lost some buttons along the way? A bear who loves buttons this much must have a special heart. Let's see where the button trail takes us...

DE-BUTTONIZE
Yup. You guessed it. The first thing to go were all the buttons... just for now.

But, ugh. She's a bit more distressed than I was counting on. Her fur is "dented" and those spots of glue have got to go.

I cleaned her up as best I could, but couldn't get all the glue off for fear of tearing her, so at this point, I'm thinking I'll make some sort of outfit to cover up all the little issues in her fur. However... I don't sew!


I tried a couple of ideas with felt, but they just looked cheesy, and I was losing the button thread (pun intended) in the process. So Button Bear and I had a little chat...

MEET BUTTON BEAR
Up in the North Pole, everyone has a job... even the teddy bears. For instance Button Bear is a junior buttoneer, which means she's part of the crew that makes sure all the dolls have their buttons sewn on just right. And she loves her job! Nothing makes Button Bear happier than when things are buttoned down. (Yes, I meant that one too.)

Button Bear has a dream that one day she'll be called upon to sew a button for Santa. What an honor that would be!


Let's see if we can't help make Button Bear's dream come true, shall we?

SANTA'S BUTTON
Now, I've already established that I don't sew, but I do crochet. So I grabbed some leftover Fun Fur yarn and made a giant snow ball for Santa's button. Of course, it has to be oversized for two reasons: 1. Button Bear is 5 1/2" tall and I wanted it to be "to scale," and 2. I needed to cover up all the dents in her fur. (If you're following along, this is the same strategy I used for Endicott Elf, and that worked great so I'm trying it again here.)

I don't know how to write crochet patterns, but if you're interested in trying this for yourself, I found this pattern for creating a crocheted ball on a lovely blog called Greedy for Colour! Just adjust the diameter of your ball to the size of the teddy you're working with. (For Button Bear at 5 1/2" tall, Santa's Button needed to be about 3" in diameter.)

Next, I sewed Santa's button to Button Bear's hands. (Yes, it looks painful, but I promise you, no harm was done to any teddy bears in the making of this ornament.) I used embroidering thread for extra strength, then sewed Button Bear's original buttons over the stitch marks to hide them.


BUTTONS! BUTTONS!
So far so cute. But, I still have six of her original buttons left over, and I'm feeling she'd want to take all her buttons with her when she is rescued...


And the good news is, the buttons covered up the glue spots!

Three buttons to go. But where to put them? Then it dawned on me. Buttoneers like Button Bear would always be prepared for a button emergency! She needs some thread!

SPOOL HAT
I grabbed a vintage wooden spool from my stash of useless-things-I-plan-to-do-something-with-someday. A dash of red paint, a bit of sparkly white yarn, three buttons to top it off and there was Button Bear's hat!


And now she's ready whenever Santa calls!

ORL #5: BUTTON BEAR


This ornament has been rescued! Please stop by our Etsy shop to see all of our other ornaments that need a home in time for Christmas. And remember...

All proceeds benefit Hasbro Children's Hospital, Providence, RI.


FOR RESCUERS...
If you want to give this a try, you'll need...
  • Small teddy bear or other soft toy
  • A selection of buttons (I used all eight of Button Bear's original buttons for this)
  • Material or yarn to make Santa's button 
  • Small wooden spool
  • Crafter's acrylic paint (your choice of color)
  • Ribbon
  • Yarn (to represent the thread on the spool)
  • Material for a hanger (I used embroidery thread)
  • Hot Glue

The basic steps are...
  1. Clean the bear's fur as best you can.
  2. Make Santa's button and sew it to your bear's hands.
  3. Sew buttons on your bear as you see fit.
  4. Paint the wooden spool
  5. Glue a strand of yarn to the spool, then wrap it around to represent thread. Use a yarn needle to weave the end in to secure the yarn to the spool. (Notice I left a tiny bit dangling from the end to look like every spool of thread I own!)
  6. Hot glue the spool to your bear's head.
  7. Attach a hanger to the toy's head (not the spool in case the glue isn't all that secure).
  8. Enjoy!


Merry Christmas!


Cheryl
Ornament Rescuer